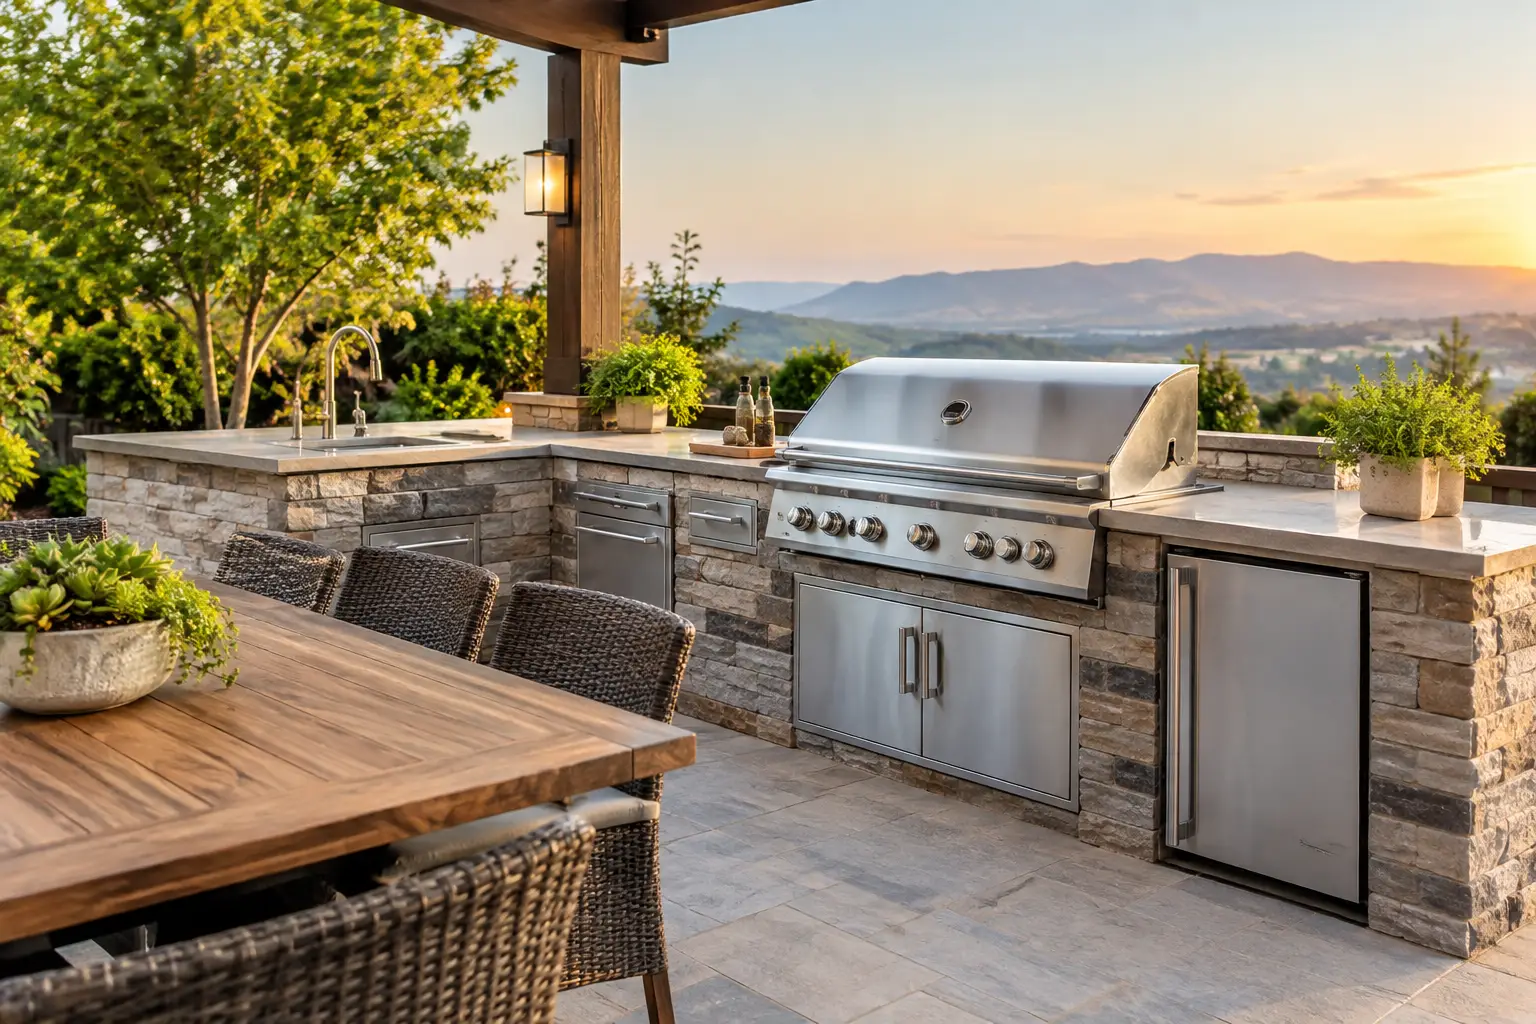
A great outdoor kitchen is not a grill pushed against the patio wall. It is a purpose-built extension of your home: a place where someone can prepare fajitas while the kids play in the yard, guests can gather without crowding the indoor kitchen, and Texas evenings feel like an occasion worth staying outside for. To design a backyard outdoor kitchen that performs as beautifully as it looks, start with how your household actually lives outdoors.
The best plans balance atmosphere with the construction details that keep the space comfortable, safe, and durable through Central Texas sun, sudden rain, and long stretches of summer heat. Before selecting a grill, stone, or countertop color, establish the right location, utilities, workflow, and level of protection for your property.
Start With the Way You Entertain
An outdoor kitchen should solve a real need, not simply fill an empty section of patio. Think about the gatherings you host most often. A family that enjoys weeknight grilling may need a compact cooking station with generous prep space. Homeowners who host game days, holidays, or neighborhood dinners may benefit from a larger layout with seating, refrigeration, storage, and a serving area that keeps guests close without placing them in the cook’s path.
Consider how many people will use the space at once. The cook needs clear access to the grill, sink, refrigerator, and trash storage. Guests need room to move around the island or dining table without creating a traffic jam. If the outdoor kitchen will sit beside a pool, plan for wet feet, towels, and a clear separation between swimming activity and hot cooking equipment.
It also helps to define what belongs outside. A built-in grill and counter may be enough for some homes. Others will use a smoker, pizza oven, griddle, beverage center, ice maker, dishwasher, or bar sink regularly. Every added appliance affects the footprint, budget, power requirements, ventilation, and maintenance plan. Build for the routines you will keep, not every feature you have seen in a project gallery.
Design a Backyard Outdoor Kitchen Around the Site
The backyard itself should guide the design. Begin by studying where the sun hits in the late afternoon, where prevailing breezes move smoke, how water drains after a heavy storm, and which views deserve to be framed. A kitchen facing west may look ideal in the morning but become difficult to use during a July dinner without substantial shade.
Proximity to the house matters as well. Building near the indoor kitchen can simplify trips for ingredients, dishes, and utilities. A more distant location may create a destination space near a pool, fire feature, or scenic part of the property, but it can require longer utility runs and more extensive site preparation. Neither approach is automatically better. The right answer depends on how the entire backyard functions.
For Central Texas properties, shade is usually a core design decision rather than an optional finishing touch. A covered patio, pergola, pavilion, or properly placed roof extension can make the difference between an outdoor kitchen that is admired and one that is used. Open pergolas provide architectural character and filtered light, while a solid cover offers stronger protection from heat and rain. If you choose a covered structure, the grill location and ventilation must be carefully planned for safety.
Drainage deserves equal attention. Outdoor cabinetry, appliances, and finished surfaces can be damaged when standing water collects around the kitchen. Proper grading, durable paving, and thoughtful drainage routes help protect the investment and keep the area comfortable after storms.
Choose a Layout That Supports Real Cooking
Most outdoor kitchens work best when the cooking, prep, cleaning, and serving zones are arranged in a simple sequence. A straight-line kitchen fits narrow patios and can be highly efficient when the grill, counter, and refrigerator are placed in a logical order. An L-shaped layout creates more counter space and naturally separates cooking from seating. A U-shaped layout offers a more enclosed chef’s station but needs sufficient square footage to avoid feeling cramped.
An island can become the social center of the backyard, especially when it includes counter seating. Keep a safe, comfortable aisle between the hot cooking surface and the seating side. Guests should be able to talk with the cook without standing directly beside flames, grease, or hot cookware.
Counter space is often underestimated. Set aside landing space next to the grill for trays and utensils, plus a dedicated prep area away from heat. Even a modest outdoor kitchen feels more useful when there is room to season food, set down a platter, and serve drinks without balancing everything on the grill shelf.
Build for Central Texas Weather
Outdoor materials have to handle intense UV exposure, high temperatures, humidity, wind, and sudden temperature shifts. A finish that looks polished on installation day but fades, cracks, rusts, or warps after a few seasons does not deliver lasting value.
For countertops, natural stone can offer a premium, distinctive look, though some stones require sealing and ongoing care. Granite remains a popular choice for outdoor kitchens because it handles heat well and offers strong visual range. Porcelain slabs can also be an excellent fit, with low water absorption and resistance to staining and fading. The best material depends on the desired appearance, exposure level, and maintenance expectations.
Cabinet construction should be selected for exterior conditions. Stainless steel provides a clean, contemporary appearance and resists corrosion when properly specified. Masonry-based structures finished with stone, stucco, tile, or concrete can create a substantial custom look and hold up well over time. Weather-rated polymer cabinetry is another practical option, particularly for homeowners seeking low maintenance and a more flexible color palette.
Avoid treating outdoor appliances like indoor appliances. Select equipment rated for exterior use, and give it the clearances required by the manufacturer. An outdoor-rated refrigerator, for example, is designed to manage changing temperatures in ways a standard indoor unit is not.
Plan Utilities Before Finishes
Utilities are the foundation beneath the visible design. If the kitchen includes a gas grill, side burner, or fire feature, determine whether the home has adequate natural gas capacity or whether propane makes better sense for the location. Natural gas eliminates tank exchanges, but the line installation can add scope and cost. Propane offers flexibility, though tank storage and access need to be considered from the beginning.
Electrical planning should account for refrigeration, lighting, outlets, ventilation equipment, fans, and future upgrades. Outdoor electrical work needs weather-appropriate components, GFCI protection, and professional installation. A few strategically placed outlets can prevent extension cords from crossing the patio during every gathering.
A sink introduces water supply and drainage questions. It is convenient for food preparation and cleanup, but it also adds plumbing scope. In some cases, a simple beverage station and thoughtfully placed hose connection may meet the family’s needs better than a full sink. This is where a design conversation can save money without compromising the way the space feels.
Local codes, setbacks, permits, and safety requirements can affect where the kitchen can be installed and how utilities are routed. Addressing these factors early protects the schedule and prevents expensive redesigns after construction begins.
Make Comfort Part of the Construction Plan
Lighting extends the use of an outdoor kitchen well beyond sunset. Combine task lighting at the grill and prep counters with softer ambient lighting under a cover, along pathways, or around seating. Bright light where food is handled improves safety. Warm, layered lighting helps the finished space feel inviting rather than overly commercial.
Ceiling fans, outdoor-rated shades, and carefully selected landscaping can help manage heat without blocking the open-air character homeowners want. If bugs are a frequent issue, screened sections or airflow from fans may be more practical than relying on temporary solutions. Consider storage too. Built-in drawers and weather-rated cabinets keep tools, serving pieces, and cleaning supplies close at hand while reducing clutter on the counters.
The visual design should connect to the home rather than compete with it. Match or complement the home’s stone, brick, stucco, metal accents, roof tones, and patio finishes. A modern home may call for clean-lined cabinetry, dark metal details, and porcelain surfaces. A Hill Country-inspired property might suit natural stone, warm wood-look elements, and a more substantial masonry presence. Consistency gives an outdoor addition the feeling that it was always part of the property.
Invest Where Daily Use Matters Most
Budgets vary, but the strongest investments usually go toward site preparation, structural work, utility installation, weather-resistant materials, and skilled craftsmanship. These are the elements that determine safety, longevity, and everyday performance. Decorative upgrades can be added in phases if needed, while poorly planned gas lines, drainage, or foundations are much harder to correct later.
A detailed project plan should establish the layout, appliance specifications, materials, utility scope, shade structure, and finish selections before work begins. At NXT Construction Inc., that client-partnership approach helps homeowners turn a collection of ideas into an outdoor living space built around their property, lifestyle, and long-term goals.
Bring a few honest details to your first planning conversation: where you spend time outside now, what frustrates you about the current patio, and what a perfect Saturday at home looks like. Those answers will shape a backyard kitchen that earns its place in your home every season.